We’re almost to there! I still love getting ready for and
celebrating Halloween, like a little kid (even if I inevitably never get any
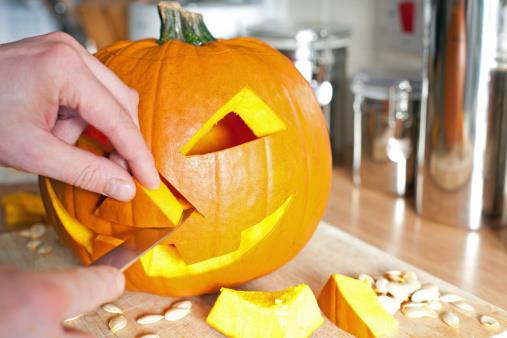
trick-or-treaters). I spend hours
cleaning out and carving the pumpkins for both my own and my parent’s home. I
thought now would be a great time to find and share some carving tips, that way
we can be ready ahead of time (figuring that more people will be getting ready
to carve this weekend or the beginning of next).

-First, the larger the pumpkin, the easier it is
going to be to carve. Try to choose pumpkins that are not cut/dinged/or
chipped, as well as pumpkins without bruising. All of the above will cause your
pumpkin to rot faster.
-Consider cutting out the bottom, as well as the
top of your pumpkin. This will not only make it easier to clean and carve, it
will also make the pumpkin and candle more stable when you’re complete.
-When you’re scooping out and preparing your
pumpkin for carving, it will also benefit you to thin out the pumpkin wall that
you will put the carving into. This will make your carving more precise and
clean.
-Don’t think it’s cheating it you utilize patterns!
There are some absolutely amazing print out, cut out, and trace onto your
pumpkin for you to have your ideal carving. If you’d rather go it your own,
without professional patterns, you should still make your tracers first on
paper and then transfer them onto your pumpkin. Trust me, once it’s cut into
the pumpkin, there’s not going back if you don’t like it!
-Keep toothpicks around in case of mistakes. We've
all accidentally taken off that tooth we left in the smiley for a toothy grin, or
the curve to the eye’s pupil. With a toothpick you can quickly get it
reattached. (I wish I’d thought of this trick before!)
-Once your pumpkin is cleaned and carved, soak it
for about an hour in a 1 tablespoon of bleach to 1 gallon of water solution. When
you bring it out, rub all of the inside and outside of your pumpkin, especially
the cut edges, in petroleum jelly or vegetable oil. This will create a
protective barrier to help prolong the life of your pumpkins. When it starts to
shrivel, you can repeat the process to bring it back and prolong it again.
Posted on Oct 23 2013 11:28AM
By LIFamilies


